CS 142: Computer Science II Java, Spring 2024
Instructors: Allison Obourn (allison.obourn)
(Last updated June 28, 2020)
Thank you to UW Seattle CSE for the contents of this tutorial.
Downloading OpenJDK
Visit the following page:
Installing the JDK
Windows
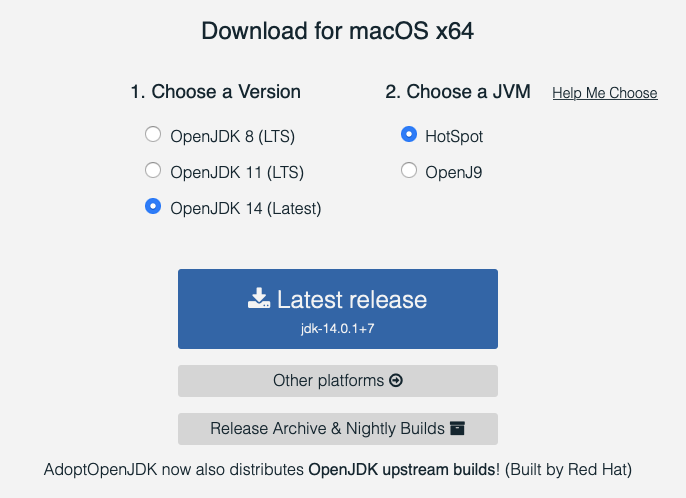
In the middle of the page under "Choose a Version" select "OpenJDK 11", then under "Choose a JVM" select "HotSpot". Lastly, click the big blue "Latest Release" button and your installer should begin downloading.
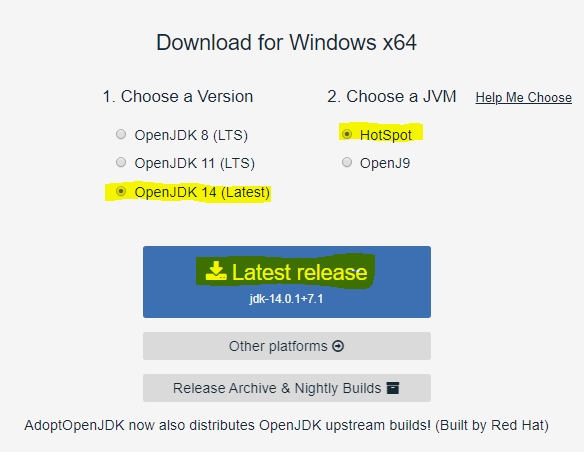
NOTE: AdoptOpenJDK.net will attempt to autodetect your operating system and whether you are using a 64 bit or 32 bit system in order to give you the appropriate installer. In most cases, you should receive the correct installer by simply clicking "Latest Release" as described above. If the installer you receive does not work on your system, you may need to click the "Other Platforms" button and re-select "OpenJDK 11" and "HotSpot", then you will be able to select your specific platform manually.
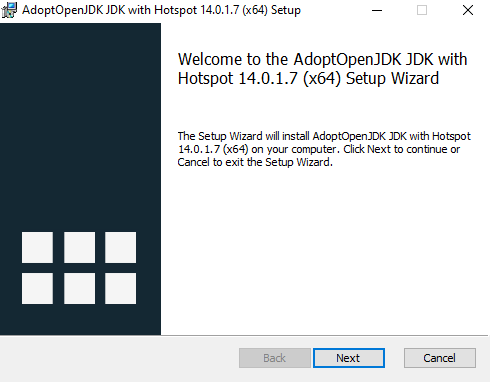
When the download is finished, open the installer and click "Next" to proceed through the installation wizard. The default settings are reasonable for most users, and you can complete the installation by repeatedly clicking "Next".
When you reach the end of the installation wizard, you will see a message saying "Completed..." Click Finish to close the wizard.
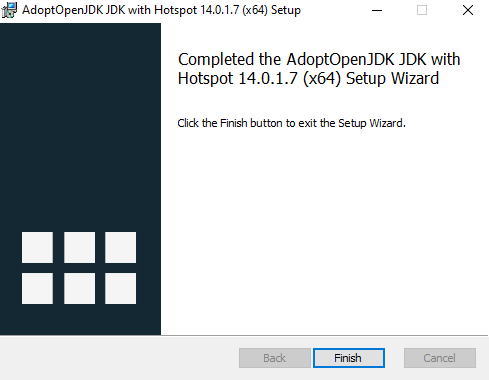
At this point, OpenJDK should be installed.
If you‘d like, you can confirm this by holding down the Windows key and pressing R,
and typing cmd /K java -version into the window that opens.
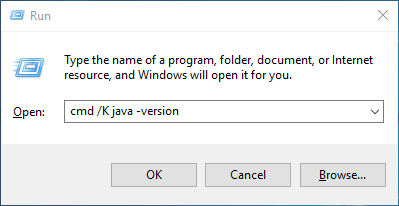
Press OK. If you see a message that looks like this:
openjdk version "11.0.1" 2020-04-14
OpenJDK Runtime Environment AdoptOpenJDK (build 11.0.1+7)
OpenJDK 64-Bit Server VM AdoptOpenJDK (build 11.0.1+7, mixed mode, sharing)
then you‘re done! However, if you see something like:
'java' is not recognized as an internal or external command,
operable program or batch file.
then the installation has failed. You may need to visit OpenJDK's "Other Platforms" page, re-select "OpenJDK" and "HotSpot", and then select your specific platform manually.
macOS
In the middle of the page under "Choose a Version" select "OpenJDK 11", then under "Choose a JVM" select "HotSpot". Lastly, click the big blue "OpenJDK 11" button and your installer should begin downloading.
Double-click the .pkg that was downloaded. An installation wizard will open:
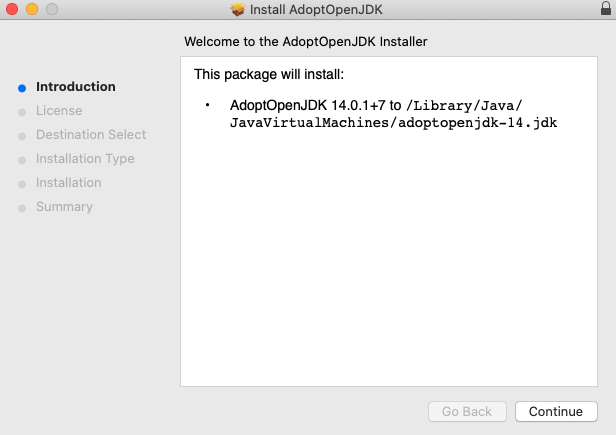
The default settings are reasonable for most users, and you can complete the installation by repeatedly clicking "Continue".
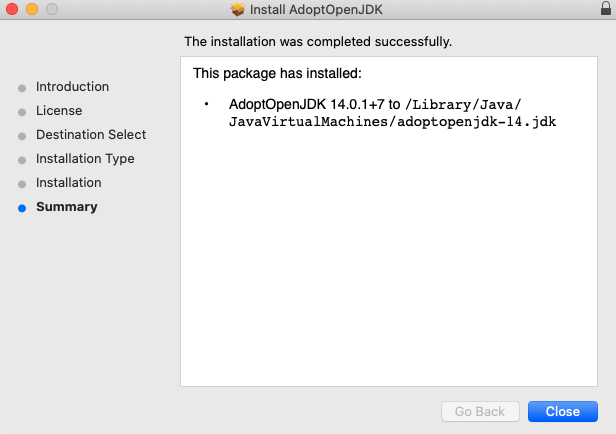
At this point, the JDK should be installed.
If you‘d like, you can confirm this by opening Terminal (Press Cmd+Space, type "Terminal", press Enter),
typing java -version, and pressing Enter.
If you see a message that looks like this:
openjdk version "11.0.1" 2020-04-14
OpenJDK Runtime Environment AdoptOpenJDK (build 11.0.1+7)
OpenJDK 64-Bit Server VM AdoptOpenJDK (build 11.0.1+7, mixed mode, sharing)
then you‘re done! However, if you see something like:
-bash: java: command not found
then the installation has failed.